Monster Christmas: Overview
Hi there! Now that the holidays are over, I can finally take a breath and do a few posts about this years’ theme: Monster Christmas!
My husband chose the theme again this year (next year, he doesn’t really get a choice. Ha!), and I didn’t have much time to work on it. I had about a month and a half to make everything and get it up in time. There were a few days I didn’t think it would get done. In the end, I had to give in and remove a few items from the list, like monster nutcrackers and the wreath. I was really sad to see the wreath go, but there just wasn’t time for it.
So here’s a quick reference list of everything I did for the theme:
- Monster tree
- Tentacle ornaments
- Haunted Christmas village
- Devil’s trap (from Supernatural) tree skirt
- Jolly Old Soul tombstone
- “Frankie” and Zombie heads
- Food
- Gingerbread monsters
- Fossil snickerdoodles
- cutout sugar cookies as coffins, beakers and sandy claws
Here’s a quick slideshow of some of the finished items! I’ll do a tutorial for most of the bulleted items above.


I’d love to see what you did this year. Share a picture in the comments 🙂
Happy Crafting,
Craft Pumpkins!
Hi there! I love, love, love craft pumpkins, so of course I’m going to share a few I’ve made so far this year.
I haven’t done any carving yet, so the first three are strictly painted.
My husband loves all things Goofy, so he naturally asked for a Goofy pumpkin. Here’s his:

The next two are currently for sale if anyone’s interested. (Comment or email me, or find me on Facebook).
The first is a full pumpkin that I painted to look poisonous and rotten. It has some sparkle to it, including a sparkly green spider.

The second is a half pumpkin with a sugar robot face! He has some (very little) sparkly bits, too. He is so cool. My little plastic Jack and Sally tsum tsums are helping hold him up in the pictures.

I hope these inspire you. There will be more Halloween pictures soon, so check back!
Happy crafting. 😊
“I Love Lucy” Sign

My husband’s mother is a big fan of the I Love Lucy show (and really, who isn’t?) It’s such a wonderful classic. For the holidays last year, we wanted to mix in some really fun handmade gifts.
Confession: My husband took so long trying to decide what to get his mom that I finally stepped in and had to help. It was days away!
We went to a few craft stores and wandered around. I wanted to get another blank sign for the next Nightmare Before Christmas sign I wanted to make, so I wandered off that way. While there, I saw this awesome white heart sign. I called my husband over and suggested a sign.
We grabbed some primary red (or as close as we could get to it) and white paints.
At home, I found a similar font to the I love Lucy logo — thank goodness for free fonts, people! — and printed out my stencil. I drew it on with a pencil and then painted red around the letters. I did an extra few coats of white as the letters just to make sure they really popped and were clean.
Here is a before and a few after photos!


Nightmare Before Christmas: Jack and Sally pumpkins

The Jack and Sally pumpkins were one of the hits of the baby shower party. They were also one of the quickest and easiest items I made!
I bought the foam half pumpkins you can get at a craft store. Then, I just painted them. That was literally it. I added a ribbon and a sparkly spider to Jack’s, but that is really it.
The design for Jack’s pumpkin is simple: Black and white stripes, just like his suit.


I followed the contours of the pumpkin. This took a few coats of paint, but it turned out so well. As an extra touch, I just added a bow made from spiderweb ribbon and added a sparkly spider sticker (try saying that three times fast!). So simple, but so perfect!
Sally’s pumpkin was a little more time consuming, but it was so worth it. I designed it based off her dress. There are different colors and patterns. Hers was so perfect and eye catching as it was that I didn’t add anything to it! In the pictures below, you can see that I used the contours of the pumpkin as a guide for the sections. I outlined them in black and used those as the places for the stitches.


Next to Jack’s pumpkin, I added two more smaller foam pumpkins. These were quick. All I did, was dry brush some black paint on them to make them darker. Then, I added more of those sparkly spider stickers.
Next to Sally’s pumpkin, I added a leaning tower of Styrofoam pumpkins. I got these at the dollar store. I gave them a quick and bright facelift and then stuck a dowel through them. I wanted them to look like they were about to fall over, much like how Sally always seemed about to fall over when she walked.


These didn’t stick to my fireplace very well (it was tiled over by a previous owner), so I used foam stickers to make them stay. It was effective, but a pain to clean up after!
Nightmare Before Christmas Ornaments

My absolute favorite addition to the Nightmare Before Christmas theme were the tattoo ornaments. I mean seriously, these things are cool.
I took a garland I already owned (and used for the Goofy theme) and added a new twist to the plain green.
The ornaments were clear glass ornaments that I picked up at Joann’s. (OK, on a side note I go to Joann’s and Michael’s a lot, but I never buy without a coupon.)
When I bought the stickers for the charms for the baby shower, the pack came with temporary tattoos. I loved them so much, but I had no idea what to do with them. I highly doubted the tattoos would make a good gift for the shower. So, after about of month of brainstorming and staring at them, I decided to do the ornaments for myself.
It was pretty simple to make these:
First, make sure the glass ornament is clean. Then, follow the instructions for the tattoos just like you would if you were putting them on your skin. Be very careful, though. I ruined a few tattoos and hard to start over because I accidentally moved the tattoo or paper while it was still wet. Be gentle. Let each side dry completely before starting the next side. I did two tattoos per ornament.
Once they were dry and all done, I went ahead and put a sealer over them. I used a Mod Podge which actually ended up giving them an almost frosted look. I love it!
I mixed them up with the licensed ornaments my parents bought me, oh…8 years ago? When we put the garland up over the fireplace, we gave it a swirly sort of look as a nod to the wreath in the movies with its garland-y tentacles!
Nightmare Before Christmas Snowy Scene

After the baby shower, I decided to use the left over decorations (what the mommy-to-be didn’t want to take), and I made Nightmare before Christmas our Christmas theme! The Halloween tree and snake stayed, as well as a few other bits and pieces. Most of the items, however, were gone.
To build upon the original theme, I decided to do a little snowy scene next to the tree. I found some printable Nightmare Before Christmas characters (like paper dolls for kids to play with) and some pre-cut trees from this really cool paper crafting set I found at Joann’s. The trees were a thick paper, almost like cardboard, and the set came with the deer, too.
I took a TV tray and put an empty snack box in the back to add depth. Then, I covered the whole tray in white stuffing, like the kind I used for the snake. I added the trees, deer and characters and voila! A wonderfully Christmas / Halloween scene.
The remaining characters were added to the TV stand, where they added a little bit of magic and tied the whole wall together. (The layout went: TV stand, TV tray, tree.)


Nightmare Before Christmas Wreath

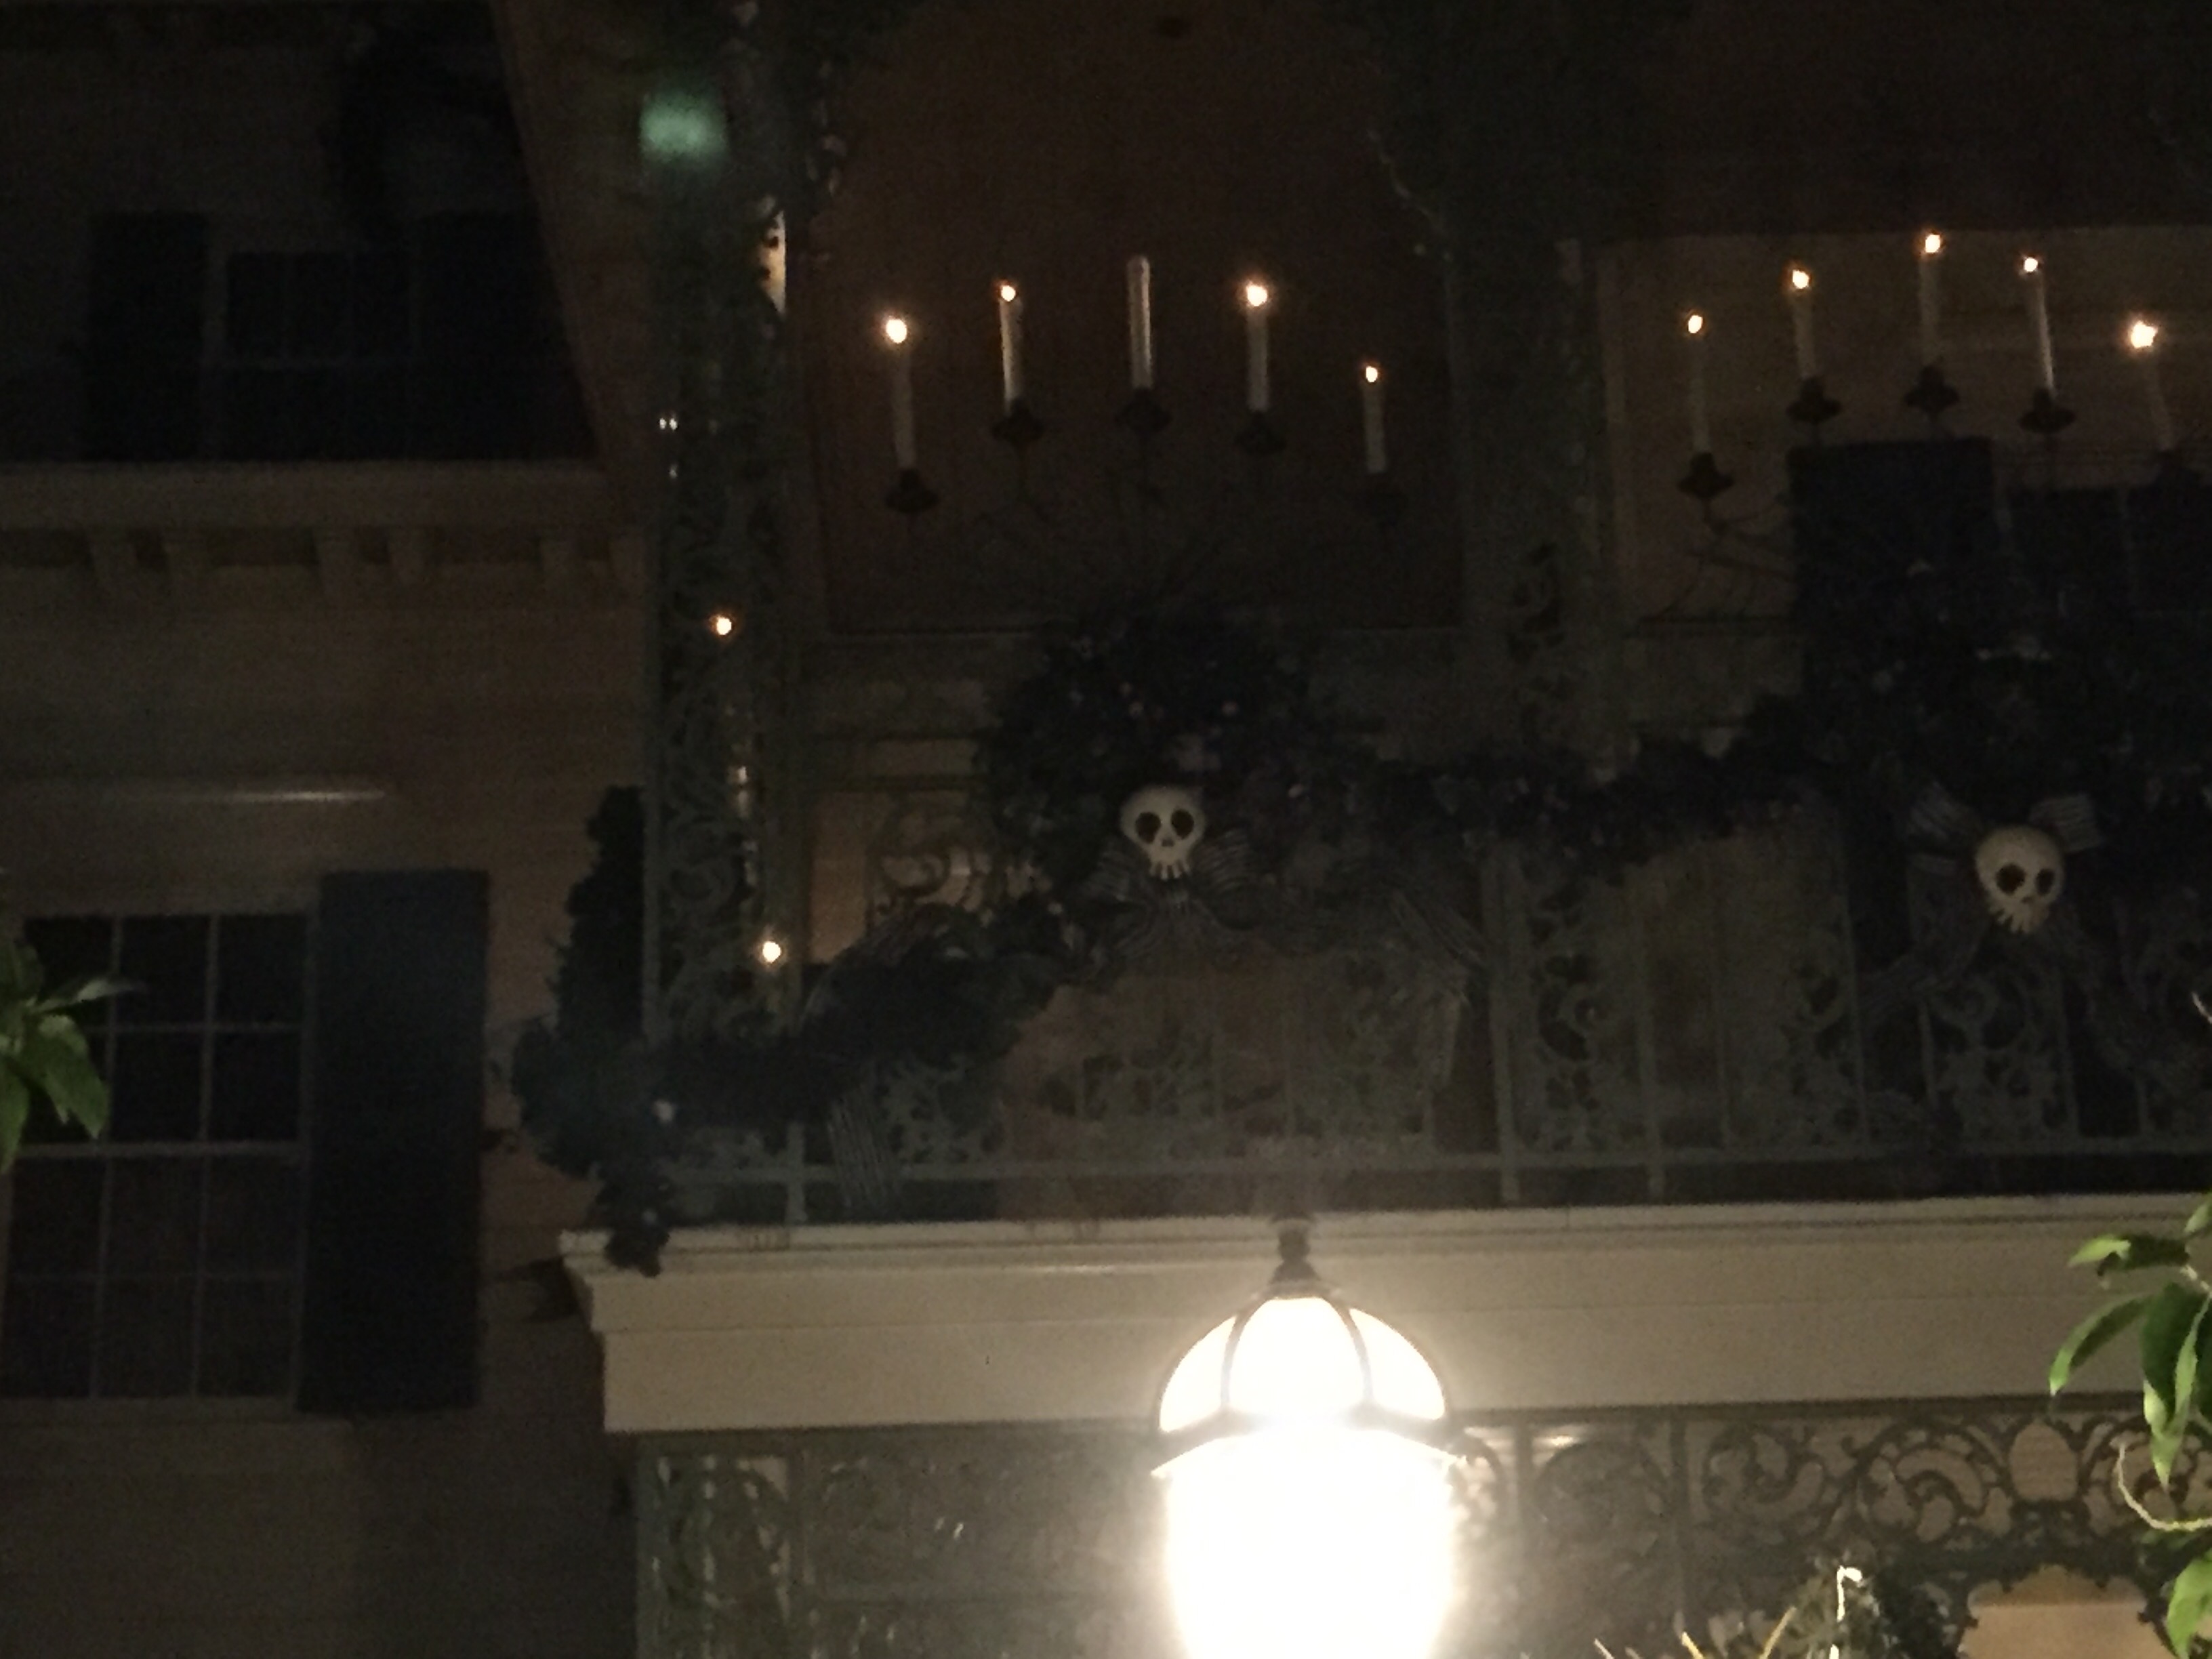
The Nightmare Before Christmas wreath was inspired by the wreaths at Disneyland in California. During the Halloween season, the Haunted Mansion gets a wonderful Nightmare Before Christmas make-over. The picture below is a bit dark, but you can see some of the inspiration behind my wreath, like the striped ribbon and the skull charm.
I took a 3-d wire wreath that already had small silver wires attached to it and wrapped a plain black ribbon around the whole thing. This covered all of the open spots that the striped ribbon left and gave it a nice uniformity.
Then, I wrapped both the striped ribbon (provided by my friend’s sister-in-law who was in charge of food and invitations) and some shiny white ribbon. I also added a few sparkly silver and black spiders to give it a nice Halloween vibe.
The whole process took about 2 hours, mostly because I was messing around with the ribbon and trying to get a good “filled in” and full look.


I made a Jack skull out of air dry clay and painted it. I basically took a ball of clay, flattened it a bit and carved the face. After it dried (about 2 days because it was so thick), I filed and sanded it down a little before painting it with black and white craft paint.
For a final touch,I added lights. It’s a small LED string with a battery pack. I was able to hide the battery pack inside the wreath by moving it under some of the ribbon.

Nightmare Before Christmas Town Sign

This Nightmare Before Christmas town sign was a lot of fun to make. I actually bought the supplies again, so I can make another one!
I took a blank wooden sign from Michael’s, sanded it, and painted it a dark grey. I had to search on the internet for a good likeness to the official Nightmare Before Christmas font (bonus, it was a free font!). I printed out the words on plain white printer paper and hand cut out each letter I needed. This is by far the longest any of it took. (Now that I have a Silhouette Cameo, creating the stencil is far easier and faster. Or, I can just use sticky vinyl. Even better!)
Once I had the letters cut out, I used them as my stencils and traced the letters onto the board. From there, I just painted the letters black and then went back around and outlined them in white.


The little Zeros and the bats were made from polymer clay. I bought a clay mold of Zero on Etsy. I already had the mold for the bats that I bought at Joann’s. They were a Martha Stewart brand. I made a half dozen of each and baked them according to the instructions on the packaging.
Once the clay cooled down, I painted them to add a few extra details, like Zero’s orange nose and the stripes on the bats. I then sealed them and glued them onto the sign. The sign went outside so people could see it walking up to the house.
When I make the second one, I’m going to use a larger font size to make it a little more dramatic, and I’m going add a few more items to it, like the bats and Zero’s.
Nightmare Before Christmas: The Snake

One of the funnest items I made for the Nightmare Before Christmas baby shower was the snake. In the movie, a giant snake eats the trees, presents, and even tries to eat one of the town residents! My snake was wrapped around the tree, waiting for tasty presents.
The body of the snake was by far the easiest part to make. I bought some orange and black striped pantyhose and cut them into two pieces. I kept the foot on one leg as the end of the snake and made the other leg into a long tube and sewed them together. I used regular stuffing to fatten up the snake. I didn’t want it to look uniform, so I went through and tried to give the snake a little more of a lumpy look with the stuffing. This was to give the impression that he had already eaten some presents. I also took a dollar-store teddy bear and placed it inside the snake. I made sure that you could see the shape of the bear through the hose. After the stuffing was done, I tied the rest of the hose closed.
The head was a little trickier. I ended up taking a beach ball and some paper and taping them together to get the general shape. I also added some paper to the other side of the head to make a little tube for the end of the body to go through.
Then, I paper mached the whole thing, forcing it into a more snake-like head. When the paper mache was dry, I painted the head orange with craft paint. The eyes were little balls of air dry clay that I painted black eyes onto.
All in all, he turned into a pretty cool present thief!
Beard Oil for Sale!

Hi everyone. I know it’s been a while, but after so many of you asked if I was selling my beard oil, I decided to go ahead and open up a store!
Please check it out:
Right now, we’re having a big grand opening sale!
